Receipt Automation Lockbox T1 Tab
Lockbox processing is available to create a posted deposit upon receipt of lockbox batch files and automate the entry of receive payments within the lockbox file. The lockbox must be added for the lockbox download to process successfully. This set up is necessary to associate lockboxes to a territory.
To Navigate to the Receipt Automation Lockbox T1 Tab
- On the Primary menu, click ORGANIZATION.
- Select territory Details
 and click the accounting > bank accounts tab.
- Select bank account Details and click the receipt automation lockbox T1 tab.
- On the receipt automation lockbox T1 tab, click [Add New]. The lockbox information screen is displayed.
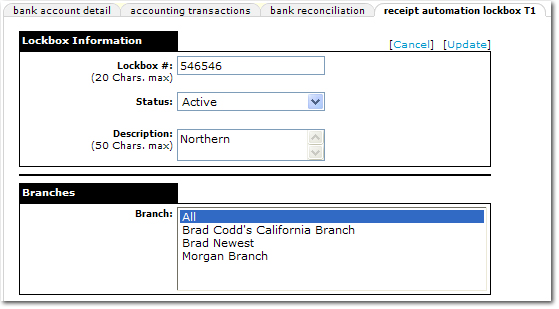
- In the Lockbox # box, enter the lockbox number. This entry must match the lockbox download batch. The entry can be made in alpha-numeric characters which are not case-sensitive.
- In the Status list, select the status of the lockbox. If the Status is set to Active, the lockbox will be available for the download process. Download files received prior to making a lockbox Inactive will continue to be available for exception processing. Any download exceptions received prior to making a lockbox Inactive will continue to be available in reports.
- In the Description box, enter an alpha-numeric description for the lockbox. This description will be displayed on the summary screen.
- In the Branch list, select the branches to be associated with this lockbox. To select more than one branch, press the Ctrl key while selecting.
- Click [Update]. The summary of lockboxes is displayed.
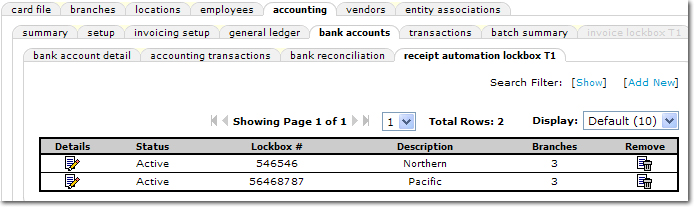
- In the lockbox summary, click the Details icon to edit the lockbox.
- If necessary, click the Remove
 icon to remove the lockbox. The lockbox can only be removed if no download activity or use of the lockbox has occurred.
Tip: Use the Inactive Status option to prevent further use of a lockbox if it cannot be removed.
Lockbox File Log Tab
Lockbox Notification Tab
Lockbox Tab
Invoice Lockbox T1 Tab